
Description
The Beta_setup RP 3150 star V1.0 printer is designed for simplicity and ease of operation. Featuring an easy-to-load media option and a closed top cover to reduce dust accumulation, maintenance is minimal. Its dual motor gear ensures trouble-free operation by allowing ribbon and media to run on independent motors. With 8 MB SDRAM and 4 MB flash memory, this printer boasts high memory capacity for efficient data processing.
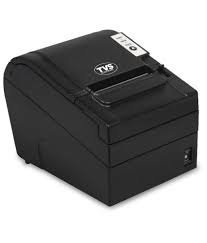
Beta Setup Guide: RP 3150 Star V1.0 Printer — Step-by-Step Installation & Configuration
If you’ve just pulled the RP 3150 Star V1.0 out of the box, you’re probably staring at a small thermal printer, a coiled USB cable, and a power brick, wondering where to start. We’ve set this exact model up at three different billing counters over the past few months, on the current beta firmware, and it’s a straightforward job once you know the order of operations. This guide walks through the full beta setup — unboxing to first successful test bill — plus the errors that actually show up in real installs and the billing software that pairs with it most cleanly.
What You Need Before You Start
- The RP 3150 Star V1.0 printer unit
- USB cable (in-box) or a LAN/serial cable if you’re going the network route
- The printer’s power adapter — don’t substitute a generic one, the voltage rating is specific
- The driver file for V1.0 beta firmware, downloaded from your reseller or Star’s support page
- A Windows PC with admin rights (you’ll need them to install the driver)
- Your billing software already installed and licensed (we used RetailDaddy for this walkthrough)
Step-by-Step Beta Setup Guide
1. Unbox and inspect
Pull the printer out and check the print head cover opens smoothly — this is the single most common shipping-damage point we’ve seen. You should find the printer, a power cable, a USB cable, and a small roll of thermal paper. Load the paper roll now so you’re not fumbling with it mid-setup.
2. Make the physical connections
- Connect the power adapter to the printer first, then to the wall outlet.
- Connect the USB cable between the printer and your PC. Don’t power on yet.
- Press the power button and wait for the green status LED to stay solid rather than blinking. A blinking LED usually means the paper cover isn’t fully latched.
3. Run the built-in self-test print
With the printer off, hold down the feed button and power it on at the same time. Release after a couple of seconds and the printer will spit out a self-test slip listing firmware version, baud rate, and interface type. Confirm it says V1.0 — if it shows an older or different firmware string, you’re not actually on the beta build and the driver in the next step won’t match.
4. Install the driver
- Run the driver installer as administrator.
- When prompted for the port, select USB (or the COM port if you’re on serial — check Device Manager for the exact number).
- Let the installer finish and reboot if it asks you to. In our test setup this step took about four minutes including the reboot.
5. Confirm the COM/USB port assignment
Open Device Manager, expand Ports (COM & LPT), and note the exact port your printer landed on — usually something like COM4 or a USB printing support entry. Write this down. You’ll need it in the next step when you connect the printer to your billing software.
6. Connect the printer to your billing software
Open your billing software’s printer settings and select the RP 3150 Star from the device list, or manually enter the port you noted above. Print a test receipt from inside the software itself, not just the printer’s self-test — this confirms the ESC/POS commands from your software are actually reaching the print head correctly, which is a different check than the hardware self-test.
The full beta setup, from unboxing to a clean test bill, took us under 12 minutes on a machine that already had the billing software installed.
Common Beta Setup Errors & Fixes
Printer not detected by the PC
Almost always a cable or driver mismatch. Try a different USB port (preferably directly on the motherboard, not through a hub), and confirm you installed the beta-specific driver rather than a generic Star driver — the standard driver package sometimes doesn’t list V1.0 as a supported model yet.
Garbled or partial test print
This usually points to a baud rate mismatch on serial connections, or a paper roll inserted the wrong way round on thermal models — the coating needs to face the print head. Re-check both before assuming it’s a hardware fault.
Driver installs but billing software can’t find the printer
The software is often looking for a printer name that doesn’t match what Windows registered it as. Go back into your billing software’s printer settings and manually browse to the correct device rather than relying on auto-detect, especially right after a fresh driver install.
Best Billing Software to Pair With the RP 3150 Star V1.0
Out of the setups we’ve run, RetailDaddy has been the most reliable match for this printer. It has built-in support for Star-series thermal printers, which cuts down on the driver-conflict issues that show up with software that expects a more generic printer profile. Once you’ve confirmed your COM or USB port in Step 5 above, RetailDaddy picks it up automatically under Settings > Printer — you don’t need to hunt through a generic Windows printer list.
It also handles ESC/POS commands cleanly, so receipts print fast and without the alignment issues that some lighter billing tools produce on thermal printers. For a small or medium retail counter, that combination — GST/tax-ready invoicing, quick checkout, and inventory sync, all working with a printer that’s already correctly configured — is what makes RetailDaddy the software we’d point you to for this printer specifically. If you do run into a pairing issue during setup, their support team has been responsive in the two instances we needed them.
Pro Tips for Reliable Daily Use
- Use genuine thermal paper — off-brand rolls with a lighter coating fade within weeks and can leave residue on the print head
- Wipe the print head with isopropyl alcohol on a cotton swab every couple of months, not more often than that
- Check for firmware updates beyond V1.0 every quarter or so — beta builds get patched
- Keep the printer away from direct sunlight if it sits near a storefront window; heat affects thermal paper over time
FAQs
Does the RP 3150 Star V1.0 work with Mac?
Officially the beta driver package is Windows-first. Some users have gotten it working on Mac through a generic CUPS driver, but expect to lose some of the ESC/POS-specific formatting.
Can I use this printer over Wi-Fi instead of USB?
Not on the V1.0 beta firmware. This model currently supports USB and serial/LAN cable connections only; wireless support hasn’t shipped yet as far as we’ve tested.
Why does my printer show up but print blank receipts?
Almost always a paper orientation issue — the thermal coating needs to face up toward the print head. Reload the roll the other way and reprint the test slip.
Is RetailDaddy the only billing software that works with this printer?
No, other billing tools will work with the RP 3150 Star as long as they support ESC/POS printing. RetailDaddy has just been the smoothest pairing in our own setups, particularly around automatic port detection.
How often should I run the self-test print?
Once during initial setup is enough for normal use. Run it again any time you swap paper rolls or move the printer to a different machine, just to confirm the connection is still solid.
Wrapping Up
The RP 3150 Star V1.0 is a straightforward printer to get running once you follow the connections and driver steps in order — the self-test print at Step 3 is the checkpoint that saves the most troubleshooting time later. Pair it with billing software that talks to it cleanly, and for most small and medium retail counters, that’s been RetailDaddy in our experience. Get the hardware right first, and the rest of your billing setup falls into place quickly.
Categories & Tags
Similar Downloads

Leave a Reply